

Filing a roof insurance claim can feel confusing if you haven’t done it before. Here’s a plain-language walkthrough of how the process typically works and what to watch for.
Step 1: Document the Damage
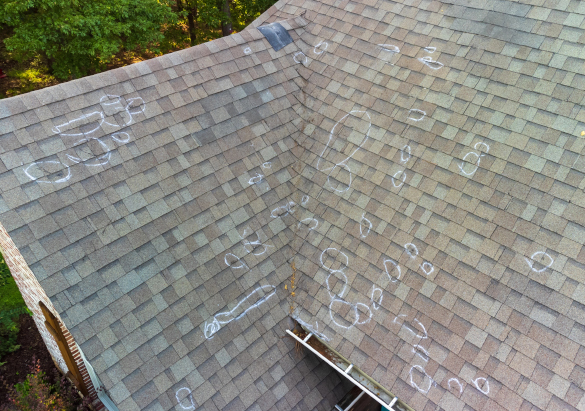
Before anyone else gets involved, take photos of any visible damage — shingles, gutters, dented vents, and any interior water stains. Note the date of the storm if you know it; insurers often use storm-date databases to verify claims.
Step 2: Get a Professional Inspection
A licensed roofer can identify damage that isn’t obvious from the ground and put together documentation that supports your claim. This is also when you’ll find out whether the damage is likely to meet your policy’s claim threshold.
Step 3: File the Claim and Schedule the Adjuster Visit
Your insurance company will send an adjuster to inspect the roof and write up their own estimate. It’s worth having your roofer present for this inspection — they can point out damage the adjuster might miss and make sure the scope of work is accurate.
Step 4: Compare the Estimates
Insurance estimates sometimes miss code-required items (like proper drip edge or ventilation upgrades) or underestimate quantities. A good roofer will compare their own estimate to the carrier’s line by line and submit a supplement for anything missing, backed by photos and code citations.
Step 5: Understand Recoverable Depreciation
Most policies are “replacement cost value,” meaning part of your payout (the depreciation) is held back until the work is actually completed. Once the roof is done, you submit proof of completion to release that final payment.
A Note on Choosing Your Contractor
You always have the right to choose your own contractor — an adjuster or insurance rep steering you toward a specific company is worth being cautious about. We attend the adjuster inspection with our customers, handle the paperwork and supplement process, and never ask you to waive or absorb your deductible, since that’s considered insurance fraud in Texas.